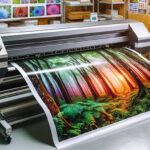
Laminating latex prints is a practical way to extend the life of your graphics, signage, or displays. Whether you’re producing banners, wall coverings, or retail graphics, adding a protective layer helps defend against scratches, moisture, UV fading, and everyday handling. This guide explains the process step by step, including the tools you’ll need, best practices, and common pitfalls to avoid.
If you’re new to latex printing or want to optimize your workflow, you might also be interested in latex printing for banners, which covers materials and techniques for high-quality results.
Why Add Lamination to Latex-Printed Graphics?
Latex inks are known for their flexibility, eco-friendliness, and durability. However, even the most robust prints can benefit from an extra layer of defense. Lamination offers several advantages:
- Scratch resistance: Protects prints from physical abrasion during handling, installation, or cleaning.
- UV protection: Reduces fading caused by exposure to sunlight, especially for outdoor or window displays.
- Moisture barrier: Shields graphics from humidity, spills, and cleaning agents.
- Enhanced appearance: Gloss, matte, or satin finishes can improve visual impact and tactile feel.
- Easy cleaning: Laminated surfaces are easier to wipe down and maintain.
While latex prints are already water-resistant and flexible, lamination is recommended for high-traffic areas, outdoor signage, or any application where longevity and presentation matter.
Choosing the Right Laminate for Latex Prints
Not all laminates are created equal, and compatibility with latex inks is crucial. Here’s what to consider:
- Film type: Pressure-sensitive (cold) laminates are most common for latex prints, as heat-activated (thermal) films can cause ink reactivation or print distortion.
- Finish: Choose between gloss, matte, or satin based on the intended look and glare requirements.
- Thickness: Thicker films offer more protection but may reduce flexibility for banners or wraps.
- Adhesive compatibility: Ensure the adhesive is designed for latex-printed media to prevent delamination or silvering.
For more on the science behind latex printing and how it compares to other ink technologies, see this in-depth explanation of latex printers and their benefits.
Preparing Latex Prints for Lamination
Proper preparation is essential for a flawless finish. Follow these steps before applying any laminate:
- Allow for adequate curing: Latex inks need time to fully cure and outgas. Most manufacturers recommend waiting at least 24 hours after printing before laminating. Skipping this step can lead to bubbles or adhesive failure.
- Inspect the print: Check for defects, dust, or debris. Any imperfection will be trapped under the laminate.
- Clean the surface: Use a lint-free cloth to gently wipe away dust or fingerprints. Avoid solvents that could damage the print.
- Trim if necessary: For best results, trim the print to size before lamination, leaving a small border if you plan to mount or frame the piece.
Step-by-Step Guide: Laminating Your Latex Prints
The actual process of applying a laminate can be done by hand for small prints or with a laminator for larger graphics. Here’s a breakdown of both approaches:
Using a Cold Roll Laminator
- Set up the laminator: Load the laminate film according to the manufacturer’s instructions. Make sure the rollers are clean and free of adhesive residue.
- Align the print: Place the latex print on the feed table, ensuring it is straight and free of wrinkles.
- Start the lamination: Slowly feed the print and laminate into the rollers, keeping tension even. Use the take-up reel if available.
- Trim the edges: Once laminated, trim away excess film for a clean finish.
Laminating by Hand (Small Prints)
- Cut the laminate: Measure and cut the laminate film slightly larger than your print.
- Peel and stick: Peel back a small section of the release liner and align the laminate with the edge of the print.
- Smooth out bubbles: Use a squeegee or soft cloth to press the laminate onto the print, working from the center outward to avoid air pockets.
- Finish the edges: Trim any overhanging laminate for a neat result.
For more advanced applications like wall coverings, you might want to explore latex printing on wallpaper for additional tips on installation and finishing.
Common Issues and Solutions When Laminating Latex Prints
Even with careful preparation, issues can arise. Here are some common problems and how to address them:
- Silvering: This refers to tiny air bubbles or streaks that appear under the laminate. It’s often caused by insufficient curing or dust on the print. Allow more curing time and ensure a clean work area.
- Delamination: If the laminate peels away, it may be due to incompatible adhesive or improper application. Always use laminates designed for latex inks and apply even pressure.
- Wrinkles or creases: These can occur if the print isn’t fed straight or if there’s too much slack. Use guides and keep the print taut during lamination.
- Edge lift: Trim edges cleanly and avoid stretching the laminate. For banners or flexible graphics, consider edge-sealing tapes.
For textile applications, check out printing on fabrics with latex inks for more on finishing techniques.
Best Practices for Long-Lasting Laminated Latex Prints
- Store prints flat: Avoid rolling tightly or stacking heavy items on top of laminated graphics.
- Clean gently: Use a soft, damp cloth for cleaning. Avoid harsh chemicals or abrasive pads.
- Monitor environmental exposure: Even with lamination, prolonged direct sunlight or moisture can eventually degrade prints. Rotate displays or use UV-blocking overlaminates for outdoor use.
- Test materials: Always test new laminate films on a sample print before full production.
For those working with canvas or textiles, printing on canvas with latex printer and printing on textiles with latex printers offer additional insights into finishing and protection.
FAQ: Lamination and Latex Printing
How long should I wait before laminating a latex print?
Most manufacturers recommend waiting at least 24 hours after printing to ensure the inks have fully cured and any residual moisture has evaporated. This prevents issues like silvering or adhesive failure during lamination.
Can I use thermal laminates on latex prints?
It’s generally best to use pressure-sensitive (cold) laminates with latex-printed graphics. Thermal laminates can reactivate the ink or cause warping, especially on heat-sensitive substrates.
What’s the best way to avoid bubbles under the laminate?
Ensure the print is completely clean and cured before starting. Use a laminator with even pressure, or, if working by hand, apply the laminate slowly and smooth out air pockets with a squeegee as you go.
Is lamination always necessary for latex prints?
Not always. For short-term indoor use or applications where durability isn’t critical, you may skip lamination. However, for outdoor displays, high-touch surfaces, or premium graphics, lamination is highly recommended.
Which laminate finish should I choose?
The choice depends on your application. Gloss finishes enhance color and vibrancy but can reflect light. Matte or satin finishes reduce glare and fingerprints, making them ideal for displays in bright environments.