Many people are interested in creating their own vinyl stickers as a fun and creative project. But did you know that you can easily print vinyl stickers using an inkjet printer right at home? It’s true, and it’s here! With the right materials and guidance, you can produce high-quality stickers that look amazing. In this article, we will outline how to print vinyl stickers with inkjet printer step by step, so you can jumpstart your own sticker creation process.

Understanding Vinyl Stickers
Before we dive into the printing process, lets understand what vinyl stickers are. They are durable, weather-resistant stickers that are perfect for outdoor use. These stickers are commonly used for car decals, bumper stickers, and outdoor signs.
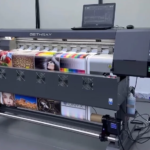
Getting to Know Your Inkjet Printer
Your inkjet printer can do more than just print documents. It’s a versatile tool that, when paired with the right materials, can produce beautiful stickers. Let’s explore:
- Ensure your printer model is compatible with printing on vinyl paper.
- Learn about basic printer care to achieve optimal printing results.
Materials Needed to Print Vinyl Stickers
Getting the right materials is crucial for success. Here’s what you’ll need:
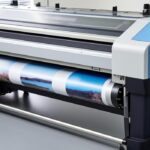
Vinyl Printer Paper
This is the special paper needed for your project. It’s designed to work with your printer to create professional-grade stickers. You can find some good options at your local office supply store or [online](https://www.avery.com/blog/how-to-create-personalized-stickers/).
Inkjet Printer
Hopefully, you already have one! Make sure it’s functioning correctly and that you have plenty of ink.
Design Software
Use software like Adobe Illustrator, Photoshop, or even free options like [Microsoft Word](https://www.instructables.com/How-to-make-custom-stickers-with-Microsoft-Word/) that help you design a sticker.
The Step-By-Step Guide to Printing
Designing Your Sticker
Choose your design software and create a layout for your sticker. Make sure your designs are vibrant and clear.
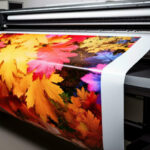
Printing the Sticker
- Load your vinyl paper into the printer.
- Use the design software to align and print your stickers correctly.
- Adjust your printer settings for the best quality print.
Protecting Your Stickers
To ensure durability, use a clear laminate over your printed design. This step is essential for weatherproofing your stickers.
Cutting Out Stickers
Once printed, carefully cut around each design with precision tools or a cutting machine.
Troubleshooting Common Issues
If you’re facing challenges, here are some solutions:
- Issues with ink smudging? Ensure the vinyl paper is compatible.
- Problems with alignment? Double-check software settings and positioning.
Tremendous Benefits of DIY Vinyl Sticker Printing
Creating your stickers can be rewarding. Here are a few benefits:
- Cost Efficiency: Printing at home saves money.
- Creativity: Customize stickers to your preference.
- Fun: Engaging in a creative process can be enjoyable for all ages.

FAQs
Can you use any inkjet printer for vinyl stickers?
Generally, yes, as long as it’s compatible with vinyl paper and you use the correct settings.
What software is best for designing stickers?
Popular choices include Adobe Illustrator and Photoshop. However, free tools like GIMP work well too.
Is laminating necessary?
For outdoor stickers, laminating is recommended to protect against the elements.
For more information on types of printing, check [here](https://newprintingera.com/what-are-the-different-types-of-printing/).
Using these steps, you can start your own exciting journey in printing vinyl stickers at home. With the right materials and our helpful guide, you’ll soon be enjoying your custom creations!