Are you ready to add some sparkle and shine to your creations? You’re in the right place. Printing glitter stickers at home is not just fun, but also a great way to personalize your projects. This guide will take you through the exciting process of creating your own glitter stickers, providing you with all the details you need to get started.

The Appeal of Glitter Stickers
Glitter stickers can turn an ordinary item into something extraordinary. They are perfect for decorating journals, laptops, phone cases, and more. With their shimmering finish, these stickers provide a touch of glamour and individuality to your belongings.
Materials You Need
Glitter Sticker Paper
The most important material you need is glitter sticker paper. You can find it in various finishes, such as holographic or metallic. Be sure to choose the paper that best matches your design style.
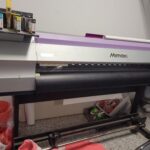
Printer
Make sure your printer is compatible with the glitter sticker paper. An inkjet or laser printer can both work, but check the specifications of the paper for compatibility. Printers for labels are often suitable for this purpose.
Design Software
Use design software to create or import your designs. Programs like Adobe Illustrator or Canva are excellent choices for crafting your unique stickers.
Cutting Tools
Depending on your preference, you may need a pair of scissors or a cutting machine like a Cricut to cut out your stickers.
Printing Guide: Step-by-Step
Design Your Stickers
Create your design using your chosen software. Consider incorporating elements that will complement the glitter effect, such as bold colors and outlines.
Prepare Your Printer
Set your printer settings to accommodate the glitter sticker paper. Adjust the paper type to glossy or specialty, and select the highest print quality Learn about sticker paper option.
Test Print
Before using your glitter paper, do a test print on regular paper to ensure everything looks perfect.
Print on Glitter Paper
Load your glitter paper into the printer and print your designs. Make sure to handle the paper carefully to avoid smudging.
Cut Your Stickers
Once printed, use your cutting tools to carefully cut out each sticker. Be precise for the best results.
Application Tips
Application is the final step. Ensure the surface where you apply your sticker is clean and dry. Gently peel off the backing and place your sticker. Smooth out any air bubbles for a perfect finish.
Creative Uses for Glitter Stickers
From personalizing gifts to making custom party favors, the uses for your glitter stickers are endless. They add a personal and stylish touch to almost anything.
Embracing the DIY Spirit
Creating your own glitter stickers is a wonderful way to express creativity. The process is rewarding, and the results are something to be proud of. Dive into this thrilling world and enjoy crafting your sparkling designs!

Frequently Asked Questions
- Q: Can I use any printer to print glitter stickers?
- A: While many printers can handle glitter sticker paper, it’s best to check the paper’s specifications and your printer’s capabilities to ensure compatibility.
- Q: Where can I buy glitter sticker paper?
- A: Many craft stores and online retailers sell glitter sticker paper. Be sure to choose a type that works with your printer.
- Q: How can I make my stickers last longer?
- A: To prolong the life of your stickers, apply them to clean, dry surfaces. Consider using a sticker sealant for extra durability.
For further reading, consider exploring various types of printing to discover more about label and sticker creation techniques.