Are you curious about how to print laminated stickers? Laminated stickers are popular for their durability and attractive finish, making them a top choice for marketing professionals. Whether you want them for personal use or your business, learning the art of printing laminated stickers is undoubtedly valuable. In this article, we’ll delve into the details of creating these delightful stickers using modern technology.

What are Laminated Stickers?
Before diving into the step-by-step process of printing, it’s important to understand what laminated stickers are. Laminated stickers are standard stickers covered with a protective layer of plastic film, usually through a process known as lamination. This protective layer enhances the sticker’s durability, ensuring it can withstand various environmental factors such as sunlight, water, and scratches. To explore more about the multiple types of printing and how they differ, you can check this resource.
Materials Needed to Print Laminated Stickers
Here’s a list of materials you’ll require:
- Printable Sticker Paper
- Laminating Sheets or Laminating Machine
- Inkjet or Laser Printer
- Guillotine Cutter or Scissors
- Design Software (such as Adobe Illustrator or Canva)
If you’re unsure which printer is best suited for this task, this guide on choosing the printer for label printing might be helpful.
Step-by-Step Guide on How to Print Laminated Stickers
1. Designing Your Sticker
The first step is designing your sticker using design software. Several graphic design tools can assist you in creating attractive stickers suitable for your needs. Ensure the design fits the printable area to avoid unwanted cropping.
2. Printing the Design
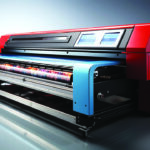
Load the printable sticker paper into your printer. Ensure your print settings are adjusted to accommodate the type of paper used. Maintain quality by selecting the highest resolution settings for a sharp output of your designs. Utilize this resource for additional tips on refining your sticker printing process.
3. Laminating the Stickers
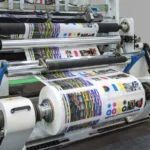
Once you have printed your sticker sheets, the next big task is **lamination**. Place your printed sticker under a laminating sheet or feed it through a laminating machine to apply the protective layer. This process adds the necessary durability to the stickers.
4. Cutting the Stickers
After laminating, use a guillotine cutter or scissors to cut out each sticker. Precision is key to ensuring clean edges and a professional finish suitable for any purpose.
Advantages of Laminated Stickers
Durability and Protection
Applying a laminate layer significantly enhances stickers’ lifespan, shielding them from external damage and making them perfect for long-term use in various applications.
Water & Weather Resistance
Due to their protective coating, laminated stickers withstand moisture and UV exposure, maintaining their appearance in various conditions.
Enhanced Appearance
Laminated stickers boast a glossy or matte finish, enriching the overall look and vibrant colors of the sticker design.
Common Mistakes to Avoid
Ensure you’re using the right paper for your printer and follow the manufacturer’s guidelines closely to prevent common mistakes when printing and laminating.

FAQ Section
Are laminated stickers waterproof?
Yes, laminated stickers are waterproof and resistant to various weather conditions due to the protective layer added during the lamination.
Can I laminate stickers without a machine?
Absolutely. You can use self-adhesive laminating sheets if you don’t have access to a laminating machine.
What is the best printer for laminated stickers?
Both inkjet and laser printers can produce excellent results. Choose one based on the type of sticker paper you’re using and your specific preference.
For more detailed information, feel free to visit this external guide on sticker printing techniques.
Whether for personal projects or professional needs, knowing how to print laminated stickers can provide many benefits. By following these simple steps, you can create high-quality, durable stickers that serve various purposes and withstand time.