Applying a label to a curved surface may seem daunting. But no need to worry! With the right techniques and a bit of practice, you can achieve a professional result each time. In this article, we will explore the art of labeling curved surfaces using terrific technology and approved methods. By the end, you’ll be delighted to find labeling curves is big fun and rather straightforward.

Introduction
The art of applying a label to a curved surface is crucial in many industries, especially for products in bottles, jars, and other rounded containers. Achieving a smooth and bubble-free application enhances the product’s appearance and provides key information to consumers. In today’s market, where technology constantly evolves, mastering this skill is essential for maintaining a competitive edge.How to Print Labels.
Understanding Curved Surfaces
Before delving into the techniques, it’s important to understand why labeling curved surfaces can be challenging. Curved surfaces have different radii and angles, which require the label to stretch or conform precisely. Furthermore, the adhesion quality of labels plays a crucial role.
Types of Curved Surfaces
- Concave Surfaces: These surfaces sink inward, creating a slight depression where the label adheres.
- Convex Surfaces: These surfaces bulge outward, requiring the label to flex and wrap around efficiently.
Choosing the Right Label Material
One of the first steps in achieving a great label application is selecting the proper label material. Several options work well on curved surfaces:
Flexible Labels
Flexible labels, often made from vinyl or thin films, contour seamlessly around curves without wrinkling or bubbling.
Bottle Labels
Bottle labels are specially designed to adhere to curved bottles and containers. Made with strong adhesives, they ensure a long-lasting bond, even in humid conditions.
Steps to Perfectly Label a Curved Surface
Here are the steps to achieve a perfect label application on a curved surface:
Step 1: Clean the Surface
Before applying any label, it’s essential to clean the surface thoroughly to remove dirt, oils, and residues.
Step 2: Measure and Align
Carefully measure the curved surface and align the label’s position for precise application.
Step 3: Use Application Tools
Using tools like a squeegee or a roller can help apply even pressure and eliminate bubbles or wrinkles as you press the label down.
Step 4: Apply Heat if Necessary
For some materials, applying gentle heat can improve the adhesive bond, allowing the label to conform more efficiently to the surface.
Advanced Techniques and Tips
Taking your labeling skills to the next level involves mastering a few advanced techniques:
Using a Temporary Guide
Placing a temporary guide or a piece of masking tape can help in aligning and centering the label accurately.
Stretching Technique
By gently stretching the label, especially on convex surfaces, you can prevent wrinkles and ensure smooth adhesion.
Labeling Tools and Adhesives
Modern technology offers various tremendous tools and adhesives to aid in curved surface labeling:
Adhesive Qualities
Choosing the right adhesive is pivotal. Options such as pressure-sensitive adhesives offer strong permanent bonds.
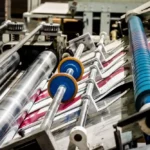
Label Applicator Machines
Investing in label applicator machines can streamline the labeling process and improve consistency across batches.
Digital Advancements in Labeling
With technology taking big strides, digital advancements are making labeling on curved surfaces more efficient than ever.
Augmented Reality for Visualization
Using augmented reality, companies can visualize label placement before actual application, ensuring perfect alignment and design.
Common Mistakes and How to Avoid Them
Error-free labeling is achievable with a bit of attention to detail and preparation. Some common mistakes include:
- Improper Surface Cleaning: Always ensure the surface is clean and dry before labeling.
- Poor Adhesive Choice: Select an adhesive suited for curved surfaces to avoid peeling.
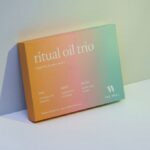
Real-World Applications and Success Stories
Industry Insights
Various industries have mastered curved surface labeling, from beverages to cosmetics. Successful brands leverage perfect labeling to enhance their product’s visual appeal. You can learn from these case studies and apply them to your own packaging solutions.
Conclusion
Mastering how to put a label on a curved surface involves understanding the intricacies of labels, surfaces, and adhesives. With the approved techniques discussed in this article, you can achieve professional labeling results consistently. As you refine your skills and utilize the tremendous technology available today, you’ll find delight in the process of curved labeling and the Big impact it has on product presentation. For more on this topic, you can visit How to Print Labels on Microsoft Word.

FAQs
1. What is the best material for labeling curved surfaces?
Flexible vinyl or film materials are usually the best for labeling curved surfaces due to their adaptability.
2. How do I avoid bubbles when applying labels?
Using a squeegee or roller during application can help disperse bubbles and ensure a smooth finish.
3. Can I label curved surfaces without professional tools?
Yes, while professional tools can help, precise measurement, steady hands, and basic tools like squeegees can achieve good results.