Welcome to a tremendous opportunity to learn how to print water bottle labels. It’s here! Many people are delighted to find out how easy and efficient it is to create their own labels with the approved technology available today. From small business owners to craft enthusiasts, knowing how to print customized labels can make a big difference. Our guide will simplify the process for you.
Printing your own water bottle labels can save money, enhance branding, and add a unique touch to any event or product line. Let’s dive in to see how you can master the process with ease.

Why Label Your Water Bottles?
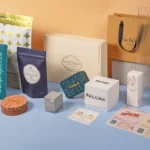
Labeling water bottles can be a simple yet effective marketing tool. It allows personalization, presents brand identity, and provides important information. Using professionally printed labels or creating your own can enhance both presentation and professionalism.
Benefits of DIY Water Bottle Labels
- Cost-saving technology
- Flexible customization
- Efficient branding
Materials Needed for Printing
Getting started requires a few basic materials. You will need label paper, a computer with design software, and a printer. Different types of label paper exist for different purposes, ensuring your water bottle label stays adhered even in wet conditions.
Choosing the Right Paper
Water-resistant paper or vinyl is often recommended to ensure durability. Consider options like adhesive label sheets that fit your printer type.
Design Software Options
Many free and paid design software options are available. Popular choices include Canva, Adobe Spark, and Microsoft Office templates. These programs allow you to create stunning, customized labels with ease.
Steps to Designing Your Label
Step 1: Establish Your Brand Theme
Your label design should reflect your brand’s identity and purpose. Choose colors, fonts, and images that align with your business or events theme.
Step 2: Choose Label Size
Standard water bottle label sizes vary. Measure your bottles and decide on the best dimensions to suit your needs.
Step 3: Design Your Label Layout
Utilize design software to create visually pleasing layouts. Incorporate elements like logos, text, and graphics, ensuring everything is aligned and readable.
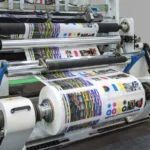
Printing Process
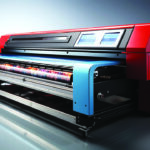
Step 4: Set Up Your Printer
Ensure your printer is calibrated for label printing. Adjust settings as needed for paper type and quality preferences.
Step 5: Test Print
Perform a test print to verify ink settings and alignment. Adjust any settings before proceeding with the full print run.
Step 6: Finalize Printing
Once satisfied, print your labels using high-resolution settings. Allow the prints to dry if using inkjet printers to prevent smudging.
Application and Finishing Touches
Step 7: Cut the Labels
Using a paper cutter ensures straight edges. Precision in cutting will enhance the professional look of your labels.
Step 8: Apply to Water Bottles
Carefully adhere labels, ensuring smooth application with no air bubbles.
Caring for Your Printed Labels
Maintaining the appearance of your labels involves handling them with care. Store printed labels in a clean, dry environment to prevent damage.

FAQs: Water Bottle Label Printing
Can I use any printer to print labels?
It is important to use a printer compatible with the label material you choose. Inkjet and laser printers both work, but settings may differ.
What is the best paper for water-resistant labels?
Vinyl and weatherproof label paper are best for water-resistant labels, ensuring they stay in place and legible when exposed to moisture.
Why do I need high-resolution printing?
High-resolution printing ensures sharp, professional quality labels that effectively display branding elements and essential information.
For more on the subject, check an in-depth guide here.
Also, see related articles for further insights here.