
Ensuring top-notch results in latex printing requires a systematic approach to evaluating output before moving to full-scale production. Whether you’re working with banners, signage, or packaging, understanding how to test print quality can save time, materials, and money. This guide covers practical steps and key considerations for assessing latex prints, helping you catch issues early and deliver consistent, professional results.
Before diving into the technical process, it’s important to recognize how advances in digital prototyping and color management have transformed the print industry. For a deeper look at these innovations, see what is digital prototyping for packaging.
Why Pre-Production Testing Matters in Latex Printing
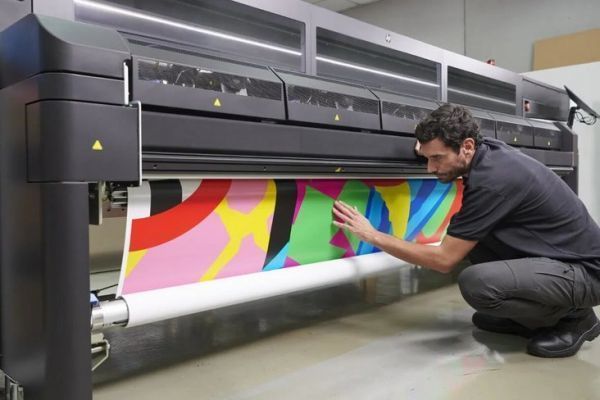
Running a test print is more than a formality—it’s a crucial quality assurance step. Latex inks and substrates can behave unpredictably depending on environmental conditions, material types, and printer settings. By evaluating a proof or sample, you can identify color inconsistencies, banding, substrate compatibility issues, and other defects before committing to a full run.
Skipping this stage risks costly reprints and dissatisfied clients. A thorough pre-production check ensures that the final output matches expectations, both visually and technically.
Key Factors to Evaluate When Checking Print Output
When learning how to test print quality for latex jobs, focus on these critical aspects:
- Color Accuracy: Compare the test print to your digital proof or Pantone swatches. Look for color shifts, dullness, or unexpected hues.
- Sharpness and Detail: Examine fine lines, text, and gradients. Blurring or jagged edges may indicate resolution or alignment problems.
- Ink Adhesion: Check that the ink bonds well to the substrate. Poor adhesion can lead to smudging or flaking, especially on specialty materials.
- Uniformity: Scan for banding, streaks, or uneven color patches. These may result from clogged nozzles, incorrect profiles, or inconsistent media feed.
- Drying and Curing: Latex inks require proper curing. Touch the print to ensure it’s dry and odor-free, and that there’s no tackiness.
- Substrate Compatibility: Some materials react differently to latex inks. Test on the actual substrate to avoid surprises in the final product.
Step-by-Step Process for Testing Latex Print Quality
A structured workflow helps ensure nothing is overlooked. Here’s a practical approach:
- Calibrate Your Monitor and Printer: Begin by calibrating your monitor and printer to ensure color consistency from screen to print. Use a reliable calibration tool for best results.
- Print a Test File: Use a standardized test image containing color bars, gradients, fine text, and photographic elements. This allows you to evaluate a range of quality indicators in one go.
- Inspect Under Proper Lighting: View the sample under controlled lighting conditions—ideally D50 or daylight-balanced light—to accurately assess colors and details.
- Compare to Reference Standards: Match your test print to approved proofs, Pantone guides, or customer-supplied samples.
- Test for Durability: If the print will be exposed to handling or outdoor conditions, perform scratch, rub, and water resistance tests.
- Document Results: Record findings and any adjustments made. This helps maintain consistency across future jobs.
Common Issues Found During Print Testing
Even with the best equipment, problems can arise. Here are some frequent issues identified when evaluating latex print samples:
- Color Banding: Visible stripes or bands, often caused by printhead alignment or low ink levels.
- Color Shifts: Mismatches between proof and print, which may be due to incorrect ICC profiles or uncalibrated devices.
- Ink Smearing: Occurs if prints are handled before fully cured, or if substrate is incompatible.
- Edge Bleeding: Ink spreading beyond intended boundaries, especially on absorbent or untreated materials.
- Loss of Detail: Fine lines or small text appearing fuzzy, typically a result of low resolution or excessive ink laydown.
Addressing these problems early allows for quick adjustments, ensuring the final production run meets quality standards.
Tips for Consistent and Reliable Print Results
Achieving repeatable, high-quality latex prints requires attention to detail and ongoing process control. Consider these best practices:
- Regular Maintenance: Clean printheads and perform routine printer checks to prevent defects.
- Use Quality Materials: Select substrates and inks recommended by the printer manufacturer.
- Profile Your Media: Create or download accurate ICC profiles for each substrate and ink combination.
- Control the Environment: Maintain stable temperature and humidity in the print area to avoid warping or ink drying issues.
- Document Settings: Keep records of successful print settings for future reference.

Comparing Latex Printing With Other Technologies
Understanding how latex printing stacks up against other methods, such as eco-solvent or UV, can help you set realistic expectations for quality and durability. For a detailed comparison, refer to this guide on latex vs. eco-solvent printing.
Each technology has its strengths and limitations. Latex is known for its environmental benefits, versatility, and odorless output, but it’s still essential to test thoroughly to ensure it meets your project’s specific needs.
Integrating Color Management for Better Print Quality
Advanced color management systems can streamline the testing process and improve consistency across different jobs and devices. Cloud-based solutions, for example, allow teams to share profiles and proofs seamlessly. For more on this topic, see the benefits of cloud-based color management.
By integrating color management into your workflow, you can reduce guesswork and minimize costly errors during production.
FAQ: Testing and Troubleshooting Latex Print Output
What is the best way to check color accuracy in latex prints?
The most reliable approach is to use a calibrated monitor, print a test file with known color values, and compare the output to industry-standard references such as Pantone swatches. Always inspect under consistent, daylight-balanced lighting to avoid perceptual errors.
How often should I run test prints?
It’s recommended to perform a test print before every new project, when changing substrates or inks, and after any printer maintenance. Regular testing ensures that any issues are caught early, preventing waste and rework.
What should I do if I notice banding or color inconsistencies?
Start by cleaning the printheads and checking ink levels. Ensure you’re using the correct media profile and that the printer is properly calibrated. If problems persist, consult your printer’s troubleshooting guide or contact technical support.
Can I use the same test process for other print technologies?
While many principles apply across print methods, each technology—latex, eco-solvent, UV—has unique requirements. Always tailor your test process to the specific printer, ink, and substrate in use.
Conclusion
Mastering how to test print quality in latex printing is essential for delivering professional, reliable results. By following a structured testing process, evaluating key quality factors, and leveraging modern color management tools, you can minimize errors and exceed client expectations. Remember to document your findings and continually refine your workflow for ongoing improvement.


