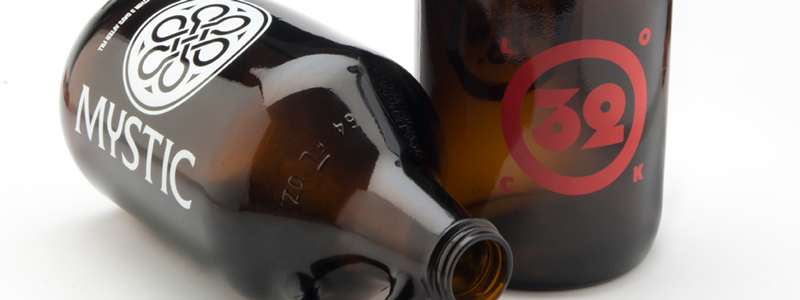

Printing on glass offers creative possibilities for branding, packaging, and interior design, but it also presents unique technical challenges. From ink adhesion issues to registration problems, mistakes can lead to wasted materials and unsatisfactory results. Understanding how to avoid glass printing errors is essential for anyone working with this medium, whether you’re a professional printer, a designer, or a DIY enthusiast.
This guide explores the most common pitfalls in glass decoration, practical troubleshooting steps, and proven techniques to help you achieve crisp, durable, and visually appealing prints. For a deeper dive into frequent pitfalls and their solutions, you might also find the article on common mistakes in glass printing helpful as a complementary resource.
Understanding the Causes of Glass Printing Issues
Before you can prevent or fix errors, it’s important to know what causes them. Glass is a non-porous, smooth material, which means inks and coatings don’t naturally bond as easily as they do with paper or plastic. The most frequent problems include:
- Poor ink adhesion leading to flaking or peeling
- Misregistration causing blurry or double images
- Surface contamination such as dust, oils, or fingerprints
- Incorrect curing resulting in tacky or easily scratched prints
- Color inconsistencies and fading
Each of these issues can stem from equipment, materials, or process errors. Identifying the root cause is the first step toward consistent, high-quality results.
Best Practices for Preventing Glass Printing Mistakes
To minimize the risk of errors, it’s essential to follow a systematic approach. Here are some proven strategies for avoiding glass printing problems:
1. Prepare the Glass Surface Properly
Cleanliness is critical. Even minor residues can prevent ink from bonding. Use a lint-free cloth and an appropriate solvent (such as isopropyl alcohol) to remove dust, grease, and fingerprints. For stubborn contaminants, consider flame or corona treatment to increase surface energy and improve adhesion.
2. Choose the Right Ink and Curing Method
Not all inks are suitable for glass. Select inks specifically formulated for glass substrates, such as UV-curable, epoxy, or ceramic inks. Follow manufacturer recommendations for curing—whether UV, heat, or air-drying—to ensure durability and resistance to abrasion.
3. Control the Printing Environment
Temperature and humidity can affect ink performance and curing. Maintain a stable environment, and avoid printing in dusty or humid conditions. Store inks and substrates in climate-controlled areas to prevent condensation and contamination.
4. Calibrate Equipment Regularly
Misregistration and inconsistent prints often result from poorly calibrated machines. Regularly check and adjust screen tension, squeegee pressure, and printer alignment. For digital processes, ensure software settings match the substrate size and thickness.
5. Test Before Full Production
Always run test prints on the actual glass items you plan to use. This allows you to spot and correct issues before committing to a full batch, saving time and materials.

Common Glass Printing Problems and How to Troubleshoot Them
Even with careful preparation, issues can still arise. Here’s how to address some of the most frequent challenges:
| Problem | Likely Cause | Solution |
|---|---|---|
| Ink Peeling or Flaking | Poor surface prep, wrong ink, insufficient curing | Re-clean glass, use glass-specific ink, check curing process |
| Blurry or Double Images | Misregistration, loose screens, movement during printing | Re-align equipment, tighten screens, secure glass in place |
| Color Fading | Low-quality ink, under-curing, UV exposure | Use high-quality, UV-resistant ink, ensure full curing |
| Scratched Prints | Insufficient curing, soft ink | Increase curing time or temperature, switch to harder ink |
| Pinholes or Bubbles | Dust, moisture, improper ink mixing | Clean glass thoroughly, mix ink well, control humidity |
Advanced Tips for Reliable Glass Decoration
For those seeking professional-level results, consider these advanced recommendations:
- Use adhesion promoters or primers designed for glass to improve ink bonding.
- Experiment with different mesh counts and squeegee hardness for screen printing to optimize ink deposit.
- For digital printing, select printers with precision UV curing and adjustable print heads for curved or irregular shapes.
- Regularly inspect and maintain all equipment to prevent mechanical failures that can cause defects.
- Stay updated with new technologies and materials by following industry resources and guides, such as the article on smart device glass printing.
These steps can help you consistently produce sharp, vibrant, and long-lasting prints on glass surfaces.

Helpful Resources and Industry Insights
Learning from industry experts and exploring new applications can further enhance your results. For inspiration on how printed glass can be used creatively, see this guide on creative uses of printed glass. If you’re interested in premium applications, the article on high end interior glass applications provides insights into luxury projects.
For technical details and step-by-step instructions, many professionals consult resources like this comprehensive guide to printing on glass, which covers both traditional and modern techniques.
Frequently Asked Questions
What is the best way to ensure ink adhesion on glass?
The most effective approach is thorough cleaning with a lint-free cloth and isopropyl alcohol, followed by using inks specifically formulated for glass. For added security, apply an adhesion promoter or primer before printing.
Why does my glass print look faded after a few weeks?
Fading is usually caused by low-quality ink, insufficient curing, or exposure to sunlight. Use UV-resistant inks and make sure the curing process is complete to achieve lasting color vibrancy.
Can I print on curved or irregular glass surfaces?
Yes, but it requires specialized equipment such as rotary screen printers or digital printers with adjustable heads. Proper fixturing and alignment are crucial to avoid misregistration and ensure even ink coverage.
Conclusion
Mastering how to avoid glass printing errors is a combination of preparation, the right materials, careful process control, and ongoing learning. By following the troubleshooting tips and best practices outlined here, you can reduce waste, improve print quality, and unlock the full creative potential of glass decoration. For further reading on maximizing the impact of your glass prints in branding, visit the article on branding opportunities with printed glass.