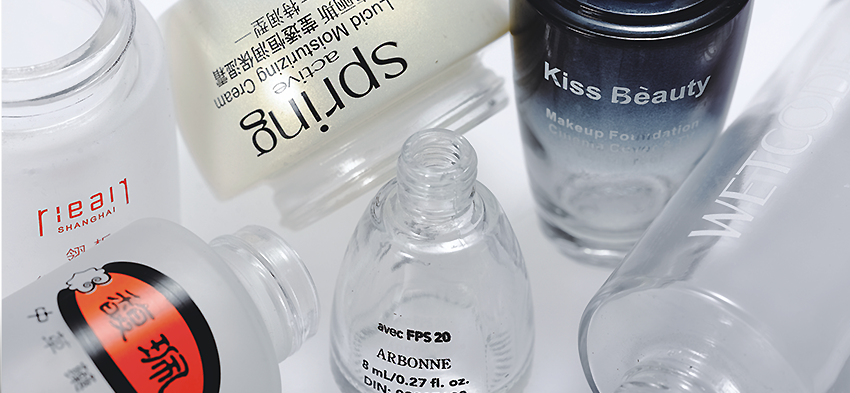

Proper glass surface preparation for printing is the foundation of high-quality, durable, and visually appealing results. Whether you are working with bottles, panels, or decorative pieces, the initial steps taken to clean and treat the glass can make or break the final print. Skipping or rushing through these steps often leads to poor ink adhesion, smudging, or even total print failure. This guide covers the essential procedures, best practices, and common pitfalls to help you achieve consistent and professional outcomes on any glass substrate.
Understanding the nuances of preparing glass for printing is especially important for businesses and hobbyists aiming for flawless branding, product decoration, or custom artwork. If you want to avoid costly errors, it’s worth reviewing common mistakes in glass printing before diving into your next project.
Why Glass Cleaning and Surface Treatment Matter
Glass, by its nature, is a non-porous and smooth material. This makes it challenging for inks, coatings, or adhesives to bond effectively. Any trace of dust, oil, or residue can prevent proper adhesion, resulting in prints that peel, flake, or fade prematurely. Thorough cleaning and surface activation are therefore non-negotiable steps in the glass surface preparation for printing process.
In industries such as packaging, interior design, and electronics, printed glass is often used for branding and functional purposes. For example, branding opportunities with printed glass are expanding in luxury packaging and retail displays, where pristine print quality is essential.
Step 1: Initial Cleaning – Removing Dust and Debris
The first step in preparing glass for printing is to remove all visible particles. Dust, lint, and small debris can create imperfections in the print and disrupt ink flow. Use a clean, lint-free microfiber cloth to gently wipe the surface. For larger items or production runs, compressed air can help dislodge stubborn particles from corners and edges.
- Inspect the glass under good lighting to ensure no particles remain.
- Avoid using paper towels, as they may leave fibers behind.
- Handle glass with gloves to prevent fingerprints and oils from transferring.
Step 2: Degreasing – Eliminating Oils and Residues
Even after dusting, glass surfaces often retain invisible oils from manufacturing, handling, or packaging. These oils can repel ink and cause adhesion failures. The most effective way to degrease glass is with a dedicated glass cleaner or a solution of isopropyl alcohol and distilled water (typically 70% alcohol to 30% water).
Spray the cleaner onto the glass and wipe with a fresh microfiber cloth, using circular motions. Repeat if necessary until the surface squeaks when wiped. For industrial applications, automated washing systems may be used to ensure uniform cleaning across large batches.
Step 3: Surface Activation – Improving Ink Adhesion
After cleaning and degreasing, the glass may still be too smooth for optimal ink bonding. Surface activation techniques are used to create microscopic roughness or alter the surface energy, making it more receptive to inks and coatings. Common methods include:
- Flame Treatment: Passing the glass quickly through a controlled flame oxidizes the surface, increasing its wettability.
- Corona Discharge: Exposing the glass to a high-voltage electrical discharge to modify surface properties.
- Chemical Etching: Applying a mild etching cream or solution to create a slightly roughened texture.
For small-scale projects, products like Armour Etch Cream can be used to etch the surface before printing. Always follow safety guidelines and manufacturer instructions when handling chemicals or equipment.
Step 4: Rinsing and Drying – Ensuring a Residue-Free Surface
After any chemical or mechanical treatment, it is critical to rinse the glass thoroughly with distilled water to remove any remaining residues. Tap water may contain minerals or contaminants that could interfere with printing. Allow the glass to air dry in a dust-free environment or use a clean, lint-free cloth to speed up the process.
Inspect the surface once more before moving on to the printing stage. Any streaks, spots, or smudges should be addressed immediately, as they will be magnified by the printing process.

Step 5: Handling and Storage Before Printing
Once the glass is fully prepared, it should be handled with care to prevent recontamination. Use powder-free gloves and avoid direct contact with the printing area. If there is a delay before printing, store the glass in a clean, covered environment to protect it from dust and airborne particles.
For large-scale production, racks or trays lined with non-abrasive materials can help keep items separated and pristine. Label each batch to track preparation date and ensure proper workflow management.
Choosing the Right Printing Method for Prepared Glass
With the surface ready, selecting the appropriate printing technology is the next step. Popular options include screen printing, digital UV printing, and pad printing. Each method has unique requirements for ink type and curing. For example, screen printing kits like the Caydo Screen Printing Kit are ideal for small runs or custom designs, while industrial processes may use automated systems for high-volume output.
Be sure to match your ink and curing process to the prepared glass surface. Some inks require additional primers or post-treatments to achieve maximum durability and color vibrancy.
Tips for Consistent Results in Glass Printing Preparation
- Standardize your cleaning and activation procedures for every batch.
- Document each step and any issues encountered for future reference.
- Test print on a sample piece before committing to a full production run.
- Stay up to date with advances in smart device glass printing and coating technologies.
For creative applications, exploring colored glass decoration methods can add value and uniqueness to your products. Meanwhile, those in manufacturing may benefit from learning about industrial glass printing uses for broader context.
Common Challenges and How to Overcome Them
Even with careful preparation, issues can arise. Some of the most frequent challenges include:
- Poor Ink Adhesion: Usually caused by incomplete cleaning or insufficient surface activation. Double-check your process and consider additional treatments.
- Streaks or Spots: Often due to drying with contaminated cloths or using impure water. Always use distilled water and clean materials.
- Recontamination: Minimize handling after preparation and use protective storage solutions.
For inspiration on how glass can be used in high-end environments, see these impressive ideas for glass in luxury interior design.
Frequently Asked Questions
What is the most important step in preparing glass for printing?
The most crucial step is thorough cleaning and degreasing. Any residue left on the glass can prevent ink from adhering properly, leading to poor print quality or durability issues.
Can I use household glass cleaners for surface preparation?
While some household cleaners can remove dirt, they may leave residues that interfere with printing. It’s best to use isopropyl alcohol or a dedicated glass cleaner formulated for industrial or artistic applications.
How do I know if my glass is ready for printing?
After cleaning, degreasing, and activating the surface, inspect the glass under good lighting. It should be free of dust, streaks, and fingerprints, and should feel slightly more receptive (less slippery) to the touch. A water droplet should spread evenly rather than bead up.
Is surface activation always necessary?
For most professional and industrial applications, yes. Surface activation ensures maximum ink adhesion and print longevity, especially on smooth or treated glass.
What precautions should I take when handling prepared glass?
Always use clean, powder-free gloves and avoid touching the print area. Store prepared glass in a covered, dust-free environment until printing.