
The eco solvent printing process has become a preferred choice for businesses and print professionals seeking high-quality, durable, and environmentally conscious print solutions. This method uses eco-friendly inks that emit fewer volatile organic compounds (VOCs) compared to traditional solvent inks, making it suitable for both indoor and outdoor applications. Whether you’re producing banners, vehicle wraps, or signage, understanding the workflow and best practices for this technique is essential for consistent results.
In this article, you’ll find a detailed walkthrough of each stage involved, from preparing your artwork to finishing the final product. We’ll also highlight the advantages, common challenges, and practical tips for optimizing your workflow. If you’re interested in broader sustainable print trends, you may also want to explore our insights on guide to solvent-free printing processes for additional context.
Understanding Eco Solvent Printing: Key Concepts
Before diving into the step-by-step workflow, it’s important to grasp what sets this method apart. Eco solvent printing utilizes inks derived from organic solvents that are less aggressive and more environmentally friendly than traditional solvent-based inks. These inks are designed to work with a range of media, including vinyl, canvas, and specialty films, delivering vibrant colors and strong outdoor durability.
Compared to UV or aqueous printing, eco solvent technology offers a balance of weather resistance, flexibility, and cost-effectiveness. For a deeper comparison between ink technologies, see this detailed breakdown of UV ink versus eco solvent.
Step 1: Preparing Artwork and Selecting Media
The first step in any eco solvent printing process is preparing your digital artwork. Use high-resolution files (preferably vector or 300 DPI raster images) to ensure crisp output. Calibrate your monitor and use color profiles compatible with your printer and ink set to achieve accurate color reproduction.
Next, select the appropriate print media. Common substrates include:
- Self-adhesive vinyl for vehicle wraps and stickers
- Banner materials for outdoor advertising
- Canvas for art reproductions
- Backlit films for illuminated displays
Always check that your chosen material is rated for eco solvent inks to prevent adhesion or drying issues.
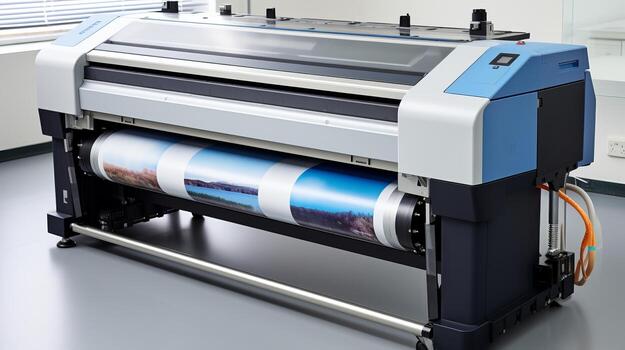
Step 2: Printer Setup and Ink Management
Proper printer configuration is crucial for optimal results. Begin by loading the selected media onto the printer, ensuring it is aligned and tensioned correctly. Check that your eco solvent ink cartridges or refillable tanks are filled and that the print heads are clean and free of clogs.
Many modern printers offer automated maintenance cycles, but manual checks are still recommended. Run a nozzle check and print a test pattern to confirm all colors are firing correctly. Adjust print head height and platen gap based on the thickness of your media to avoid smudging or head strikes.

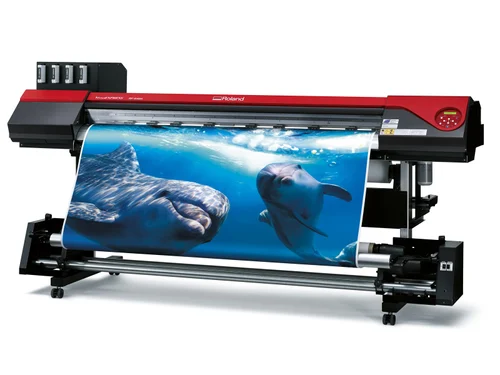
Step 3: Printing and Monitoring Output
With your printer and media ready, send your artwork to the RIP (Raster Image Processor) software. This software manages color conversion, resolution, and print settings. Choose the correct media profile and set the desired print quality—higher quality settings use more ink and take longer but yield better results.
During printing, monitor the output for any banding, color shifts, or ink pooling. If issues arise, pause the job and check for clogged nozzles or incorrect settings. Consistent room temperature and humidity help maintain print quality, as eco solvent inks can be sensitive to environmental changes.
Step 4: Drying and Curing
Unlike aqueous inks, eco solvent formulations require time to cure fully. Most prints are touch-dry as they exit the printer, but full chemical curing can take up to 24 hours. Allow prints to rest in a dust-free environment to prevent smudging or contamination.
For high-volume jobs or urgent deadlines, some printers include built-in heaters or fans to accelerate drying. However, avoid rolling or finishing prints until they are completely cured to ensure maximum durability and scratch resistance.
Step 5: Finishing and Application
Once cured, prints can be laminated, cut, or mounted as needed. Lamination adds extra protection against UV light, abrasion, and chemicals, extending the lifespan of outdoor graphics. For vehicle wraps and complex surfaces, use appropriate application tools and techniques to avoid bubbles or wrinkles.
Proper storage and handling are also important. Store unused prints flat or rolled with the printed side facing out to prevent creasing. If you’re interested in advanced finishing techniques or specialty packaging, our article on how to achieve photographic quality on corrugated flutes provides further insights.
Advantages and Challenges of Eco Solvent Printing
This printing method offers several notable benefits:
- Eco-friendly: Lower VOC emissions and reduced odor make it safer for indoor use.
- Versatility: Compatible with a wide range of substrates, including flexible and rigid materials.
- Durability: Prints are water-resistant and UV-stable, suitable for outdoor environments.
- Cost-effective: Lower ink consumption and maintenance costs compared to some alternatives.
However, there are a few challenges to consider:
- Longer curing times compared to UV printing
- Limited compatibility with certain specialty materials
- Requires regular maintenance to prevent print head clogging
For those seeking even more sustainable solutions, exploring the trends in wood-grain and natural textures on print can offer inspiration for eco-conscious packaging and display projects.
Tips for Optimizing Your Eco Solvent Workflow
- Use genuine or high-quality compatible inks to avoid print head issues.
- Regularly clean your printer and perform maintenance routines.
- Store media in a climate-controlled environment to prevent warping or moisture absorption.
- Test new materials or profiles with small print runs before full production.
- Keep detailed records of settings and results for repeat jobs.
Frequently Asked Questions
What materials are best suited for eco solvent printing?
Eco solvent printers work well with self-adhesive vinyl, banners, canvas, and certain specialty films. Always confirm that your chosen substrate is compatible with eco solvent inks to ensure proper adhesion and durability.
How long does it take for eco solvent prints to cure?
While prints are usually dry to the touch immediately after printing, full curing can take up to 24 hours. This ensures the ink bonds completely with the substrate, maximizing resistance to scratching and fading.
Is eco solvent printing environmentally friendly?
Compared to traditional solvent inks, eco solvent formulations emit fewer VOCs and have a lower environmental impact. They are safer for indoor use and contribute to improved air quality in print shops.
Can I use eco solvent inks for food packaging?
Eco solvent inks are not typically certified for direct food contact. For food-safe packaging, consider alternative processes such as those discussed in our what is sublimation printing for specialty packaging guide.
Conclusion
Mastering the eco solvent printing process allows print professionals to deliver vibrant, durable graphics while reducing environmental impact. By following each step carefully—from artwork preparation to finishing—you can achieve consistent, high-quality results across a variety of applications. Stay informed about evolving technologies and best practices to keep your print business competitive and sustainable.


