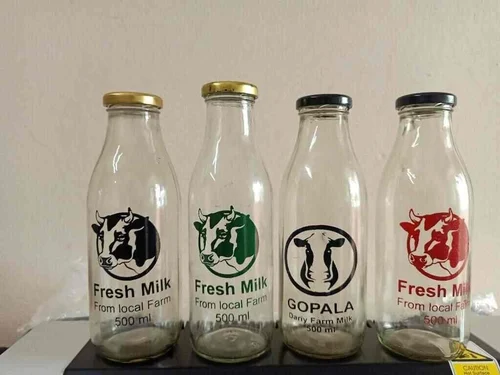

Proper cleaning glass before printing is a critical step for anyone working with glass decoration, whether for industrial, commercial, or creative projects. Skipping or rushing this process can lead to poor ink adhesion, uneven prints, and wasted materials. Understanding the right methods and materials for preparing glass surfaces ensures that prints are durable, vibrant, and professional-looking.
Many print failures on glass are caused by invisible contaminants—dust, oils, or residues from manufacturing and handling. Even new glass can have a thin layer of release agents or fingerprints that interfere with ink or coating adhesion. Taking the time to clean thoroughly helps avoid common pitfalls and delivers consistent results.
For those interested in learning more about process pitfalls, check out common mistakes in glass printing to further improve your results.
Why Surface Preparation Matters for Glass Printing
Glass is a non-porous material, which means that inks, coatings, and adhesives have a hard time bonding unless the surface is perfectly clean. Any trace of grease, dust, or previous labels can cause the print to peel, flake, or appear blotchy. Effective glass pre-treatment is essential for:
- Ensuring strong ink or paint adhesion
- Preventing defects like pinholes, streaks, or bubbling
- Improving the durability and longevity of the print
- Reducing costly rework and material waste
Whether you’re using screen printing, digital printing, or etching, a spotless surface is the foundation for high-quality results. For advanced applications, such as smart device glass printing, surface preparation is even more critical due to the precision required.
Common Contaminants That Affect Print Quality
Before diving into cleaning methods, it’s important to recognize what you’re removing. The most frequent contaminants found on glass surfaces include:
- Fingerprints and skin oils from handling
- Dust and airborne particles settling during storage
- Manufacturing residues such as release agents or lubricants
- Adhesive remnants from labels or tapes
- Water spots or mineral deposits from improper rinsing
Each of these can create a barrier between the glass and the ink, leading to poor adhesion and unsatisfactory results.
Step-by-Step Guide: How to Clean Glass for Printing
To achieve optimal results, follow these steps for cleaning glass before printing:
- Initial Inspection: Check the glass for visible dirt, labels, or sticky residues. Remove any labels carefully, using a plastic scraper if needed.
- Washing: Wash the glass with warm water and a mild detergent. Use a non-abrasive sponge or cloth to avoid scratching. Rinse thoroughly to remove all soap.
- Degreasing: Wipe the surface with isopropyl alcohol (IPA) or a dedicated glass cleaner. This step removes oils and invisible residues. Use lint-free wipes for best results.
- Drying: Air dry or use a clean, lint-free cloth. Avoid paper towels, as they can leave fibers behind.
- Final Inspection: Hold the glass up to the light to check for streaks, spots, or remaining contaminants. Repeat cleaning if necessary.
For stubborn residues, such as glue from labels, a small amount of acetone can be used, but always test on a small area first to avoid damage.
Choosing the Right Cleaning Products and Tools
The choice of cleaning agents and tools can make a significant difference. Here are some recommended options:
- Isopropyl Alcohol (IPA): Highly effective for removing oils and evaporates quickly.
- Glass Cleaners: Commercial glass cleaners work well but avoid those with added fragrances or conditioners.
- Lint-Free Wipes: Microfiber or specialized wipes prevent fibers from sticking to the glass.
- Plastic Scrapers: Useful for removing stubborn labels without scratching.
- Distilled Water: Prevents mineral spots during rinsing.
For specialty glass or when preparing for advanced techniques, such as industrial glass printing uses, always follow the manufacturer’s recommendations for compatible cleaning products.
Advanced Surface Treatments for Maximum Adhesion
In some cases, especially for high-performance or outdoor applications, additional surface treatments may be required after basic cleaning:
- Flame Treatment: Briefly passing the glass through a controlled flame increases surface energy, improving ink adhesion.
- Plasma Treatment: Uses ionized gas to activate the glass surface for better bonding.
- Etching Creams: Products like Armour Etch create a micro-rough surface, ideal for certain inks and paints.
These methods are typically used in industrial settings or for specialty projects. For most hobby or small business printing, thorough cleaning and degreasing are sufficient.

Tips for Consistent Results and Avoiding Adhesion Problems
Even with the best cleaning practices, a few additional steps can help ensure reliable outcomes:
- Wear disposable gloves to prevent re-contaminating the glass with skin oils.
- Work in a clean, dust-free environment whenever possible.
- Handle glass by the edges after cleaning to avoid fingerprints.
- Print as soon as possible after cleaning to minimize dust settling.
- Test print on a small area before full production runs.
For more on vibrant and decorative techniques, explore colored glass decoration methods for inspiration and technical advice.
Comparing Glass Cleaning Methods for Printing
| Method | Effectiveness | Best For |
|---|---|---|
| Soap & Water | Good for visible dirt and dust | General cleaning, pre-degreasing |
| Isopropyl Alcohol | Excellent for oils and residues | Final wipe before printing |
| Acetone | Very strong, removes adhesives | Stubborn label/glue removal |
| Flame/Plasma Treatment | Maximizes adhesion | Industrial and specialty printing |
| Etching Cream | Creates micro-rough surface | Etched designs, specialty inks |
For a deeper dive into professional techniques, see this guide to top glass printing methods for additional insights.
FAQ: Glass Preparation for Printing Success
What happens if I skip cleaning before printing on glass?
Skipping cleaning can result in poor ink adhesion, causing prints to peel, flake, or appear uneven. Contaminants like oils and dust prevent proper bonding, leading to wasted time and materials.
Can I use household glass cleaners for print preparation?
Some household glass cleaners contain additives that can leave residues. It’s best to use isopropyl alcohol or a dedicated, residue-free glass cleaner to ensure a pristine surface.
How soon should I print after cleaning the glass?
Print as soon as possible after cleaning to minimize the risk of dust or contaminants settling on the surface. If the glass sits for a while, inspect and wipe it down again before printing.
Are there differences in cleaning requirements for screen printing vs. digital printing?
Both methods require a clean surface, but digital printing may be more sensitive to residues due to finer ink droplets. Always follow the specific recommendations for your printing process and ink type.
What’s the best way to remove stubborn label adhesive from glass?
Use a plastic scraper and a small amount of acetone or isopropyl alcohol. Test on a small area first to avoid damaging the glass, and always clean thoroughly afterward to remove any solvent residue.
By following these best practices for cleaning glass before printing, you’ll achieve strong, long-lasting prints and avoid the most common adhesion issues. For more on durable techniques, see the advantages of screen printing on glass and keep your projects looking their best.