Getting your designs ready for glass printing requires careful planning and attention to detail. Whether you’re working on custom bottles, decorative panels, or branded glassware, the way you prepare your digital files can make a significant difference in the final result. This guide covers the essential steps and best practices for preparing artwork for glass printing, ensuring your prints are sharp, accurate, and production-ready.
From choosing the right file format to understanding color management and vector requirements, each stage of the process impacts the quality and durability of your printed glass. If you’re new to this process or want to avoid common pitfalls, it’s helpful to review resources like common mistakes in glass printing for additional insights.

Understanding Glass Printing Methods and Their Impact on Artwork
Before you begin setting up files for glass printing, it’s important to know which printing method will be used. The three most common techniques are screen printing, digital UV printing, and decal transfer. Each method has unique requirements for file preparation:
- Screen Printing: Best for bold, single-color or limited color designs. Requires vector artwork and color separations.
- Digital UV Printing: Allows for full-color, high-resolution images. Accepts both vector and high-res raster files.
- Decal Transfer: Suitable for complex, multi-color graphics. Needs precise sizing and often a white underbase layer.
For a deeper look at the different processes, check out this overview of glass printing methods to understand which approach fits your project best.
Key Steps in Preparing Artwork for Glass Printing
Proper file setup is crucial for achieving crisp, durable prints on glass. Here are the main steps to follow:
1. Choose the Right File Format
Most print providers prefer vector files (such as AI, EPS, or PDF) for their scalability and sharpness. Vectors ensure that lines and shapes remain crisp at any size, which is especially important for screen printing. If your design uses photographs or gradients, use high-resolution raster files (at least 300 DPI) in formats like TIFF or PNG. Avoid JPEGs when possible, as compression can introduce unwanted artifacts.
2. Set the Correct Dimensions and Bleed
Measure your glass item carefully and create your artwork at the exact print size. For full-wrap designs, account for the curve and circumference of the object. Add a bleed area (usually 2–5 mm) to prevent unprinted edges, especially for edge-to-edge graphics. Always check with your printer for their specific bleed requirements.
3. Use Vector Graphics for Line Art and Text
For logos, icons, and text, always use vector elements. This ensures the sharpest possible print and allows for easy color separation if needed. Convert all fonts to outlines to avoid font compatibility issues during production.
4. Color Management and Spot Colors
Color accuracy can be challenging on glass due to its transparency and the way inks interact with the surface. Use Pantone or other standardized spot colors for consistent results, especially in screen printing. For digital printing, work in CMYK color mode and avoid relying on RGB colors, which may not translate accurately to print.
5. Prepare for White Ink and Underbase Layers
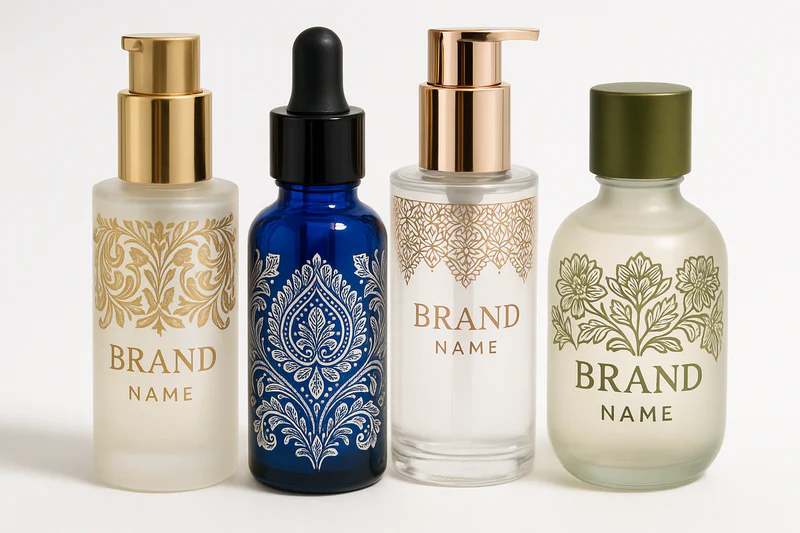
Because glass is transparent, most prints require a white underbase to make colors stand out. Create a separate layer in your file for white ink, matching the areas where you want color opacity. Label this layer clearly (e.g., “White Underbase”) and use 100% black to indicate white ink coverage. Consult your print provider for their preferred setup.
6. Outline All Fonts and Expand Strokes
Convert all text to outlines and expand any strokes or effects. This step prevents unexpected changes if the printer does not have your fonts or if effects do not translate correctly between software versions.
7. Check Artwork Placement and Orientation
Ensure your design is properly aligned and oriented for the specific glass item. For cylindrical objects, consider how the design will wrap and where seams or overlaps may occur. Provide clear placement guides or mockups if possible.
Special Considerations for Different Glass Items
Not all glass surfaces are the same. Here are a few tips for common objects:
- Bottles and Jars: Account for curves and avoid placing critical details near seams or handles.
- Flat Panels: Use precise measurements and ensure artwork is centered and scaled correctly.
- Drinkware: Consider user grip and visibility—avoid placing text where it may be obscured.
For more on the technical side of glass printing in manufacturing and technology, see industrial glass printing uses for additional context.
Tips for a Smooth Production Process
- Communicate with Your Printer: Always ask your print provider for their specific file setup guidelines. Requirements can vary based on equipment and materials.
- Proof Your Artwork: Review every detail, including spelling, alignment, and color separations. Request digital or physical proofs before final production.
- Consider Durability: Choose inks and finishes that suit the intended use—whether for decorative, industrial, or food-safe applications.
- Stay Updated on Techniques: New methods, such as smart device glass printing, may offer additional options for customization and precision.
Common File Setup Mistakes to Avoid
Even experienced designers can overlook important details. Avoid these frequent errors when preparing files for glass printing:
- Forgetting to add a white underbase for opaque colors on clear glass
- Using low-resolution raster images, resulting in blurry prints
- Failing to convert fonts to outlines, causing font substitutions
- Not accounting for bleed or wrap on curved surfaces
- Submitting files in the wrong color mode (use CMYK, not RGB)
For more on design and decoration options, see colored glass decoration methods for creative inspiration.
Frequently Asked Questions
What is the best file format for glass printing artwork?
Vector files such as AI, EPS, or PDF are preferred for most glass printing processes, especially screen printing. For photographic or complex images, use high-resolution TIFF or PNG files at 300 DPI or higher.
How do I prepare a white underbase layer?
Create a separate layer in your design file that indicates where white ink should be printed. Use 100% black to mark these areas and label the layer clearly. Always check with your print provider for their preferred method of indicating white ink.
Can I use gradients and transparency in my artwork?
Gradients and transparency effects are possible with digital UV printing, but may not reproduce well in screen printing. For screen printing, simplify gradients into halftones and avoid transparency. Always consult your printer for their capabilities.
Conclusion
Proper preparation of artwork for glass printing is essential for achieving professional, high-quality results. By following the steps outlined above—choosing the right file formats, managing color, creating underbase layers, and communicating with your printer—you can ensure your designs look their best on any glass surface. Staying informed and attentive to detail will help you avoid costly mistakes and produce glass prints that stand out for their clarity and durability.